I’ve always rolled my eyes at the phrase “everything is content” – but maybe this one is.
I’m not one for the selfie sprints or a bounce cam reel. There’s a whole generation of runners now in slick vests, perfect lighting, and product tagged videos – and fair play to them.
Me? I run in kit that’s probably past its best, I don’t wear a running vest (not sure what I’d put in it – breath mints? old receipts?), and I’m still figuring it out half the time. But if there’s something useful I’ve learned, I’ll write it down – quietly.
This is one of those posts.
The Problem Started Quietly
Back in May, I started noticing some inner shin discomfort towards the end of and after runs – especially when slowing down or coming to the top of a hill. It wasn’t unbearable, but it was new.
I chalked it up to fatigue. But it kept happening.
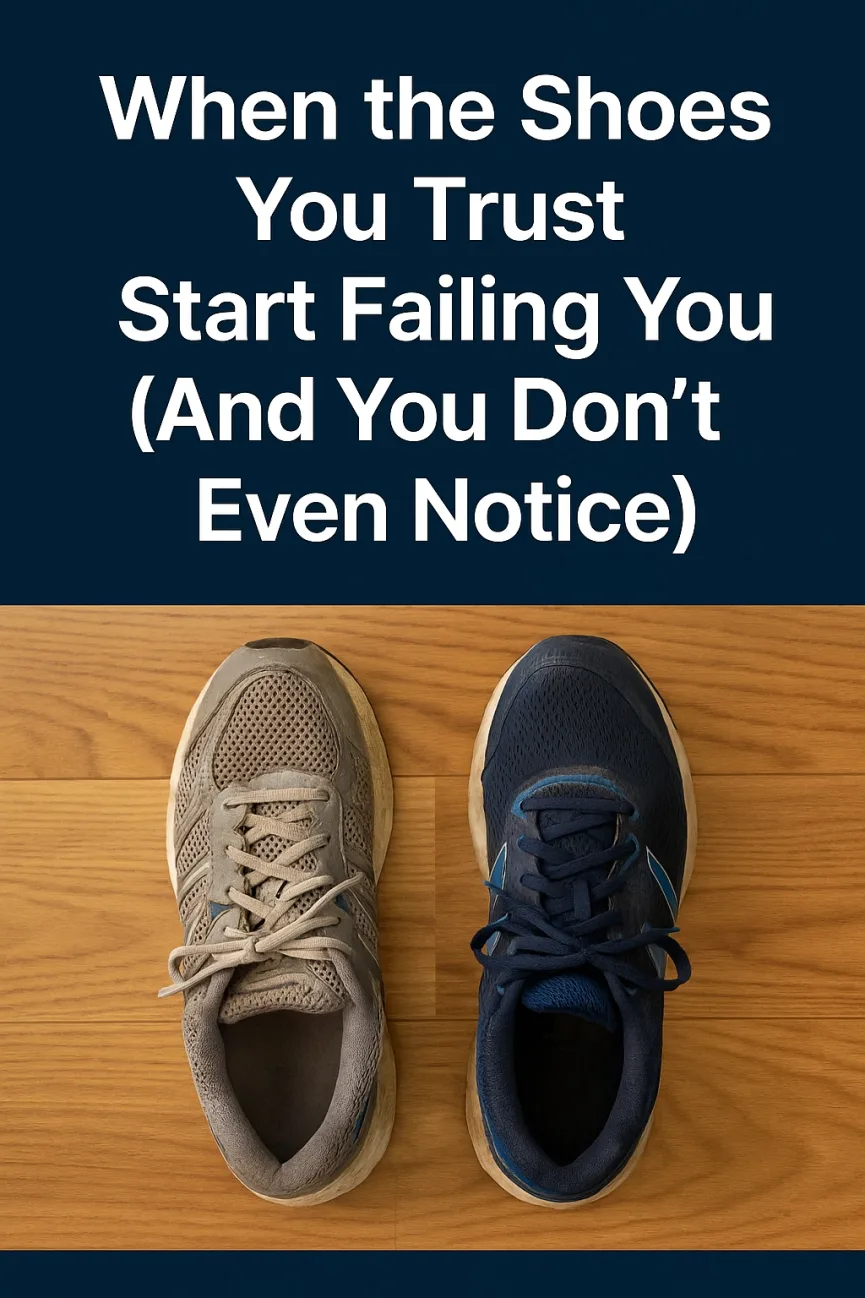
I’d been using my trusty New Balance 790 V3s – light, responsive, and never a problem before. But they’d quietly clocked over 270 miles, and while the outsole looked fine (to me), the midsole had quietly given up. My shins were doing the job the foam was supposed to do.
The Swap That (Accidentally) Made It Worse
I swapped to an old pair of Brooks Ravenna 6s – that were barely used, but I’d forgotten their V-strap midfoot design. For flat feet and wide arches, that strap works less like support and more like a clamp.
I laced them up like normal, went for a run – and the discomfort worsened. A second go, confirmed it: I’d swapped from worn-out to potentially wrong-fit.
Hindsight: What Actually Happened
- The NB midsoles broke down. I didn’t notice – because wear hides inside.
- The Ravenna’s midfoot design didn’t currently suit my arch shape under load.
- Running with a buggy added pressure, and my shins paid the price.
What Helped (and Might Help You Too)
1. Know When Foam is Done
Lightweight trainers tend to break down at circa 250–300 miles. Outsoles can mislead you – it’s the cushion underneath that goes first.
2. Check the Fit for Your Gait
Ravenna’s V-strap irritated my foot under load. If you have flatter or wider feet, look for shoes that flex with you – not squeeze you.
Window lacing helped a little. So did using a heel lock for security without over-tightening. More on that later but if you know anything about me I tend to dig deep into the subject matter to find a solution.
3. Don’t Ignore “Low-Level” Pain
That bit of shin discomfort when slowing down? That’s your body waving a little flag. Mine turned into a more stubborn issue because I wasn’t listening.
4. Relearn Your Own Running Style
I’m a flat-footed midfoot striker who runs with a buggy. My gear needs to support that – not just look good on a shelf.
I now check shoe mileage like I check tyre pressure – not because I’m obsessive, but because it keeps things moving.
Clear Explanation: Pressure-Relief (window) Lacing
What it’s for:
To reduce top-of-foot pressure or pain caused by midfoot overlays, like the V-strap on the Ravenna 6s.
Step-by-Step: How to Lace for Pressure Relief
- Lace normally from the bottom up – using the typical criss-cross method.
- When you get to the area where the pressure occurs (usually midfoot), instead of criss-crossing the laces there: Thread the lace straight up through the next eyelet on the same side.
This creates a “window” over the painful area with no crossing tension. - Once you’re past the pressure zone, resume normal criss-cross lacing up toward the top eyelets.
- Tie as usual.
You’re leaving a “window” or relief zone right where the strap or lace pressure hurts.
Why It Works:
- It stops downward pressure from being applied over tender areas like:
- Tendons on the top of the foot
- Wide/high-volume arches
- Strap overlays (like on the Ravenna)
Clear Explanation: Heel Lock Lacing (aka Runner’s Loop)
What it’s for:
To secure the heel and reduce foot slippage, blisters, and tight lacing pressure across the top of the foot. It’s especially helpful if:
- Your heel lifts in your shoe when you run,
- You get rubbing or blistering at the back of your foot,
- You need a snug fit without overtightening the whole shoe.
Step-by-Step: How to Do a Heel Lock
- Lace your shoes normally using a criss-cross pattern – all the way up until the last two eyelets.
- When you reach the top two eyelets (the ones closest to your ankle), do not criss-cross immediately.
- Instead, take the lace and thread it straight up into the top eyelet on the same side to form a small loop on each side of the shoe.
- Now take the end of each lace and cross it over, threading it through the loop on the opposite side.
- Pull down and outwards to snug the loops around your ankle – this locks your heel down into the shoe. Then tie your laces as normal.
Why It Works:
- Creates a snug pocket for your heel without pulling the whole shoe tighter.
- Prevents heel lift, which is a common cause of blisters and sliding during runs or hilly terrain.
- Lets you lace the rest of the shoe more loosely if needed – ideal for wider feet or pressure-sensitive areas like your midfoot strap zone.
Final Thought
I’m not chasing perfect footage, PRs, or viral reels. I just want to run, feel stronger, and not be undone by my shoes. If you’re doing the same – especially while managing family life, buggy running, or your own comeback – I hope this post helped you sidestep a detour.